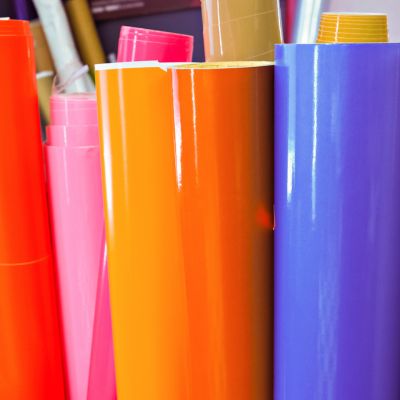
Applying vinyl to various surfaces can be an excellent way to personalize items, create signage, or add decorative touches to your home or business. However, one of the most common challenges people face when working with vinyl stickers, vinyl wrap stickers, and matt vinyl stickers is the formation of bubbles under the vinyl. These bubbles can ruin the aesthetic of your project and cause the vinyl to lift or peel prematurely. In this blog, we will provide step-by-step instructions to help you apply vinyl without bubbles, ensuring a smooth, professional finish every time.
1. Choose the Right Surface for Vinyl Application
Before applying any vinyl sticker, it’s crucial to make sure the surface is clean and appropriate for vinyl adhesion. Vinyl wrap stickers and matt vinyl stickers can be applied to a wide variety of surfaces, including glass, wood, plastic, and metal. However, not all surfaces are created equal when it comes to adhesion.
- Smooth Surfaces: The best surfaces for vinyl application are smooth, clean, and dry. Surfaces like glass, mirrors, and metal provide a great base for vinyl because they allow for strong adhesion.
- Textured Surfaces: Applying vinyl to textured surfaces, such as rough wood or brick, can cause issues with adhesion and lead to bubbles. For these surfaces, ensure that you are using high-quality vinyl designed for textured areas.
2. Clean the Surface Thoroughly
Proper cleaning is crucial to avoid dust, grease, or debris from getting trapped under your vinyl, which can lead to bubbles. Here’s how to clean the surface:
- Use a lint-free cloth: A microfiber cloth works best because it leaves no fibers behind.
- Use the right cleaner: For most surfaces, use a gentle cleaner like isopropyl alcohol or soap and water. Avoid using oils or waxes, as they can interfere with the adhesive of the vinyl wrap stickers.
Once the surface is clean, allow it to dry completely before applying the vinyl stickers.
3. Apply the Vinyl Carefully Using the Right Technique
To ensure a smooth, bubble-free application, follow these steps:
- Measure and Mark: Before peeling the vinyl backing, it’s helpful to measure and mark where you want to place the vinyl stickers. This will help ensure your design is aligned correctly, avoiding repositioning after application, which can cause bubbles.
- Peel Slowly: When removing the backing, peel the vinyl slowly and steadily. Vinyl wrap stickers and matt vinyl stickers should be handled gently to avoid stretching the material, which can cause the vinyl to warp.
- Use a Squeegee: A squeegee is your best tool for applying vinyl smoothly. Begin applying the vinyl at one edge and use the squeegee to push the vinyl down from the center outwards. This method helps to push air out and avoid any bubbles. If you don’t have a squeegee, you can use a credit card wrapped in a microfiber cloth as an alternative.
4. How to Deal with Air Bubbles
Even with the best preparation, air bubbles can still form. Here’s how to get rid of them:
- Smooth Out Bubbles: If you notice small bubbles after applying the vinyl, use a needle or pin to puncture the bubble, then press the air out using the squeegee or your fingers. Be gentle to avoid damaging the vinyl.
- Apply Heat for Stubborn Bubbles: For larger bubbles, applying gentle heat with a heat gun or hair dryer can soften the vinyl and make it easier to smooth out. Be cautious not to overheat the vinyl, as this can cause warping or distortion.
5. Allow the Vinyl to Set
After applying the vinyl, it’s essential to allow it to set for at least 24-48 hours before using or cleaning the surface. This gives the adhesive time to bond properly with the surface, preventing any lifting or peeling.
- Avoid Water: During the setting period, try to keep the vinyl dry. Avoid cleaning or exposing it to water or moisture until it has fully adhered.
- Avoid Moving: Don’t move or reposition the vinyl once it’s applied, as this can cause the adhesive to weaken and create bubbles.
6. Tips for Long-Lasting Vinyl Application
- Protect from Scratches: After the vinyl has been applied, protect it from scratches or abrasions for the first few days to ensure it adheres properly.
- Regular Cleaning: To keep your vinyl looking sharp, clean it regularly using a soft cloth. Avoid abrasive cleaners or scrubbers, as they can damage the vinyl surface.
By following these steps and tips, you can ensure that your , whether they are for a sleek look or
for bold designs, will be applied smoothly and last for a long time.
Conclusion: Perfect Your Vinyl Application Every Time
Applying vinyl without bubbles is a skill that every designer, crafter, or business owner can master with the right tools and techniques. With careful preparation, the right tools, and proper application methods, you can achieve a professional-looking vinyl application that will stand the test of time.If you’re looking to buy vinyl sheets or vinyl stickers for your next project, explore the wide range of products available at Jeewa Plastic. Whether you’re applying vinyl wrap stickers for business branding or crafting with matt vinyl stickers, we have everything you need to get started.
