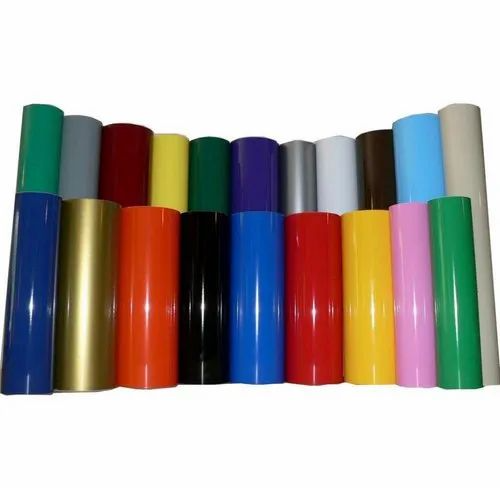
Vinyl is a versatile material used in a variety of projects, from custom signs and decals to craft projects and home décor. One of the most frustrating challenges when working with vinyl is avoiding air bubbles during application. Whether you’re a designer, a crafter, or just someone looking to apply vinyl stickers on surfaces, understanding the proper techniques will ensure a smooth, professional-looking finish.
At Jeewa Plastic, we offer high-quality vinyl stickers, matt vinyl stickers, and vinyl wrap stickers for your creative projects. In this guide, we’ll walk you through the steps to apply vinyl smoothly on different surfaces without bubbles.
1. Choose the Right Surface
The first step to avoiding bubbles during application is ensuring that you are working with the right surface.
- Smooth Surfaces: Vinyl adheres best to smooth, non-porous surfaces like glass, metal, and smooth plastic. These surfaces are ideal for vinyl wrap stickers and vinyl decals because they allow for a clean application.
- Textured Surfaces: Applying vinyl to textured surfaces, such as fabric, wood, or rough walls, can result in air pockets. If you must apply vinyl stickers on textured surfaces, make sure to choose a flexible vinyl that can adhere to uneven textures.
Tip: Clean the surface thoroughly to remove dirt, dust, or grease before application. This ensures a better bond between the vinyl and the surface.
2. Measure and Cut Your Vinyl Carefully
Before applying the vinyl, take the time to measure and cut it carefully.
- Precision Cutting: Use a sharp cutter or a cutting machine to cut your vinyl to the desired size. Ensure that the edges are smooth and straight to prevent the vinyl from lifting during the application.
- Leave Extra: If you’re applying vinyl to a larger area, it’s better to leave a little extra vinyl around the edges to allow for adjustments. You can trim the excess vinyl after the application.
3. Use Transfer Tape for Easy Application
Transfer tape is a crucial tool for ensuring that the vinyl goes on smoothly without bubbles.
- Apply Transfer Tape: After cutting your vinyl, apply transfer tape over the design. This helps hold the vinyl in place while you position it on the surface.
- Peel and Stick: Carefully peel the backing off the vinyl, ensuring that the vinyl stays attached to the transfer tape. Align it with the surface and press it down slowly, working from one side to the other to avoid trapping air bubbles.
Tip: Use a squeegee or a flat edge (like a credit card) to gently press the vinyl and remove any air pockets as you go along.
4. Work Slowly and Methodically
To prevent bubbles, it’s important to apply the vinyl slowly and methodically, especially on larger surfaces.
- Start from the Center: Begin at the center of the vinyl and work your way outwards. This ensures that any air trapped beneath the vinyl will be pushed toward the edges, rather than trapped under the design.
- Smooth, Even Pressure: Apply even pressure along the edges and surface, using a squeegee to help smooth out the vinyl. Go over the entire design to remove any small air pockets that might form during the application process.
Tip: If you do end up with a small bubble, don’t panic! You can use a pin to poke a tiny hole in the bubble and use a squeegee to flatten it out.
5. Apply Vinyl to Curved Surfaces (If Needed)
Applying vinyl to curved or irregular surfaces can be more challenging but is still possible with the right techniques.
- Heat the Vinyl: Use a hairdryer or heat gun to gently heat the vinyl before applying it to curved surfaces. The heat softens the vinyl, making it more pliable and easier to stretch over curves.
- Stretch Carefully: Gently stretch the vinyl as you apply it to the curved surface, being careful not to overstretch it. Use the heat to help smooth out any wrinkles or bubbles.
Tip: Always work slowly and keep the vinyl warm to avoid unnecessary creases or stretching.
6. Finishing Touches: Let the Vinyl Set
After applying the vinyl stickers or wraps, let the design set and bond with the surface.
- Leave to Dry: Allow the vinyl to sit for at least 24 hours to ensure it fully adheres to the surface. During this time, avoid touching or repositioning the vinyl.
- Peel the Transfer Tape: Once the vinyl is properly adhered, carefully peel off the transfer tape. Be sure to peel slowly at a 45-degree angle to avoid lifting the vinyl.
7. Troubleshooting Bubbles
If you do end up with some bubbles after application, don’t worry! Here are a few tips to fix them:
- Pin Method: For small bubbles, use a pin to make a tiny hole and gently press the air out using a squeegee or your finger.
- Heat Method: For larger bubbles, you can carefully heat the vinyl with a hairdryer and then use a squeegee to smooth it out.
Tip: Always be gentle when fixing bubbles to avoid damaging the vinyl or the surface underneath.
Where to Buy Vinyl in Sri Lanka
At Jeewa Plastic, we offer a wide variety of high-quality vinyl stickers, matt vinyl stickers, and vinyl wrap stickers perfect for all your design and crafting needs. Our vinyl products are durable, easy to apply, and available in different finishes to suit your projects.
- Vinyl Sticker Price in Sri Lanka: We provide affordable vinyl stickers in various sizes and colors for all your craft and design needs.
Visit Jeewa Plastic today to explore our selection of vinyl products and get started on your next creative project!
